EN
EN  DE
DE  ES
ES  FR
FR  PT
PT  RU
RU 
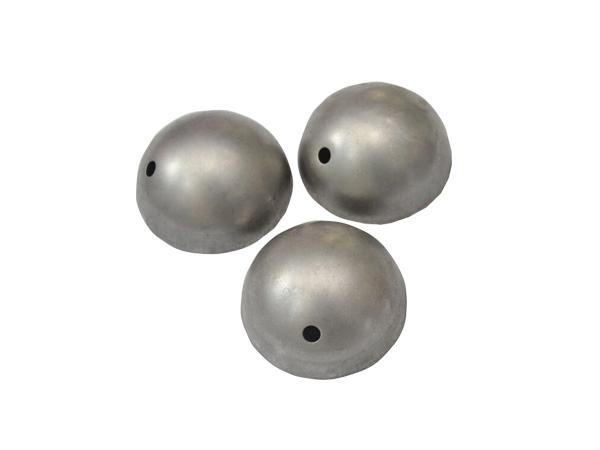
When making wax casting, crafting a wax model requires following these steps. First, choose a sturdy and precise material. A suitable mold material helps control shrinkage to below 1%, ensuring a good fit for the wax model. Many people choose to make their own molds at home; you can use simple tools and wax, making it easy to try.
Key Takeaways
- Choose a hard material for the mold. This helps prevent mold shrinkage and ensures a perfect fit to the wax model.
- Use appropriate tools, such as a vulcanizing machine and sharp knives. These tools will help you create a precise and durable mold.
- Carefully mix and pour the mold material. This will prevent air bubbles and defects in the finished casting.
Materials for Wax Mold Making
Commonly Used Mold Materials
Choosing the right material is crucial for lost-wax casting. Many artists and factories use waxes such as microcrystalline wax, paraffin wax, or beeswax to create models. Molds are typically made from a mixture of plaster and silica. Silicone is also frequently used because it allows for the creation of intricate molds and can be reused 20 to 25 times. The table below lists commonly used materials:
| Material Type | Description |
|---|---|
| Wax | Microcrystalline, paraffin, or beeswax |
| Mold Material | Plaster and silica mix, or silicone |
Mold Making Tools
Many tools are helpful for making high-quality wax models. Experts say vulcanizing machines are suitable for thermosetting molds. RTV silicone molds are ideal for lost-wax casting because of their low shrinkage. Mold cutting tools, such as sharp knives, help to make clean cuts. The table below lists some important tools:
| Tool/Material | Description |
|---|---|
| Vulcanizer | Heats and cures molds for longer life |
| RTV Silicone Molds | Low shrinkage, good for wax masters |
| Mold Cutting Tools | Sharp knives for precise cuts |
| Low Shrink Mold Rubber | Keeps mold size accurate |
Optional Supplies and Safety Equipment
Safety is paramount when making molds. Wear heat-resistant gloves, a face mask, and sleeves. Aluminum-coated clothing provides effective insulation against burns. Store wax molds in a cool, dry place to prevent deformation. Use Goo Gone or baby oil to clean tools and prepare them for the next wax casting. KEMING is committed to providing high-quality materials and professional advice to help everyone complete their work safely and efficiently.
Mold Making Steps for Lost Wax Casting
Choosing or Making a Wax Model
Artists first make wax models. They melt beeswax, vegetable oil, and resin to create wax sheets. These sheets are used to make parts, which are then assembled to form a complete wax model.
When creating different designs, they choose thicker wax. Thicker wax is stronger and better suited for mold making.
Adhesive wax helps connect the wax sheets and the gate. It holds the parts together and holds their shape. This is crucial for creating fine details. Adhesive wax is fragile in cold weather, so handle it with care.
Preparing the Mold Box and Model
The mold box is used to hold the mold material. Making the mold box correctly is very important. The size and material of the mold box must match the mold design. This avoids problems during the casting process. A good mold box helps create an accurate mold.
Artists place the wax model into the mold box. They ensure the model is stable and centered. Adhesive wax holds the gate and parts in place. This step is crucial for lost-wax casting, as it affects the quality of the final casting.
Mixing and Casting Mold Materials
Mixing mold materials requires extra care. Many people use two-component silicone rubber and follow the manufacturer’s instructions. Platinum-cured silicone rubber is best suited for projects requiring fine detail because of its extremely low shrinkage and durability. Tin-cured silicone rubber is less expensive and easier to mix, making it suitable for larger or simpler projects.
| Silicone Type | Shrinkage | Durability |
|---|---|---|
| Platinum-Cure | < 0.1% | Extremely High |
| Tin-Cure | 1%–3% | Moderate |
| DIY Caulk | Variable | Low |
After mixing, they use a vacuum chamber. This removes air bubbles. It makes the mold better and stops defects. They pour silicone over the wax model. The wax model must be covered fully. Pour slowly and steadily to keep air out.
Cure Mold
The mold needs time to set. Cure time depends on the silicone or plaster used. Artists check the pot life and cure time for each material.
| Mold Material | Pot Life | Cure Time |
|---|---|---|
| Mold Star™ 16 FAST | 6 min | 30 min |
| 00M00 30 Tin Cure Silicone | N/A | 30 min |
During the curing process, they place the mold box in a safe location. This helps the mold retain its shape and details. Proper curing is crucial for lost-wax casting, directly affecting the accuracy of the casting.
Demolding and Inspection
Once the mold has cured, the artists remove it from the box. They gently lift the mold from the wax model. Next, they check for problems such as chipped corners, air bubbles, rough spots, or adhesion.
| Defect Type | Macro Characteristics | Micro Characteristics | Typical Occurrence Positions | Identification Tools |
|---|---|---|---|---|
| Short Shot | Missing corners, blunt edges | Smooth edge transition | Blade root, gear tip, slender tube | Naked eye, magnifying glass |
| Sink Mark | Local depressed pits | Smooth surface, rounded edges | Junction of thick/thin walls, ribs | Naked eye, side lighting, touch |
| Surface Bubble | Round/oval bulges | Internal cavity, thin wall | Upper surface, far from gate | Naked eye, magnifying glass |
| Internal Bubble | Local bulging deformation | No surface opening, gas inside | Wax pattern center, thick wall | Touch, X-ray inspection |
| Flow Lines | Wavy stripes, grooves | “V” or “U” shaped grooves | Parting surface, curved surface | Magnifying glass, side lighting |
| Flash/Burrs | Overflow of thin wax flakes, sharp edges | Thickness < 0.1mm, step | Parting surface, pin hole, core head | Naked eye, caliper |
| Sticking | Surface scratches, roughness, wax residue | Irregular scratches, tearing | Mold contact surface, deep cavity | Naked eye, magnifying glass |
They use tools like magnifying glasses and calipers to find defects. Small problems are fixed with wax tools. The mold must be ready for the next casting step.
Tips and Troubleshooting
Many tips help avoid mistakes in mold making. Air bubbles are common. Artists will shine light on the wax model to find air bubbles. They will repair the bubbles with heated wax mold tools and fill the pores with wax. Placing powder in the mold’s vents and adjusting the injection speed helps prevent air bubbles from forming. Melting and vacuuming the wax model before use reduces the risk of air bubbles. A dry air supply prevents water vapor from entering the wax pot.
Other mistakes can occur during the preparation of the embedding material. Artists will use the right amount of water and powder and stir for the appropriate time. Over-stirring will result in an embedding material that is too thin or too thick. Under-stirring will result in an uneven mixture.
| Mistake Type | Description |
|---|---|
| Gas Holes | Result from inadequate mold preheating, poor exhaust design, or improper pouring techniques. |
| Shrinkage Cracks | Caused by incorrect mold temperature, inadequate coating control, or design flaws. |
| Slag Holes | Result from poor pouring practices or inadequate gate design. |
| Thermal Cracks | Caused by high cooling speeds, leading to increased internal stress. |
| Cold Shuts | Caused by venting issues, low temperatures, or improper coating. |
| Misruns | Occur when the mold cavity is not fully filled due to cold shell or slow fill rate. |
| Inclusions | Result from non-metal particles entering the mold cavity, often due to cracks in the wax mold. |
| Investment Errors | Hasty or incorrect investment preparation, including wrong water-to-powder ratios. |
| Temperature Errors | High casting temperatures can lead to defects like ‘orange peel’. |
To release the casting, artists cool the plaster in water after the metal has solidified. For ceramic shell molds, they break and scrape the mold. Choosing a mold material with a shrinkage rate of less than 1% helps prevent the shell mold from cracking.
Strict steps are followed during the casting process. They precisely measure the amount of powder and water and mix the materials according to the supplier’s instructions. They solidify the mold in the correct way. The quality of the casting surface depends on the steps of making the wax model and the embedding material. Therefore, meticulous attention to detail is crucial.
The complexity of the wax model changes the mold-making process. Artists need to sculpt the wax model, create a master mold, inject the wax model into the rubber mold, assemble the gating system, add the embedding material, release the casting, pour the metal, melt the mold, and finally complete the casting.
Making a wax model involves several steps. First, create the wax model. Next, prepare the mold box. Then, mix and pour the materials. After that, let the mold cure. Finally, check the mold for any problems. These steps can all be done at home.
| Class Description | Focus Area |
|---|---|
| Hands-on metalworking and creative arts | Lost wax casting, metalsmithing |
| Advanced techniques for silversmiths | Business growth through lost wax casting |
| Wax model design and creation | Centrifugal casting process |
| Variety of workshops available | General mold making and casting techniques |
FAQ
What is a two-piece mold? Why do artists use it?
A two-piece mold can be separated into two halves. Artists use it to create intricate wax models and easily demold.
How is molten wax poured into the mold for wax casting?
Molten wax is slowly poured into the mold. This fills every gap in the mold and prevents air bubbles from forming.
How is the wax model demolded after casting?
The mold is heated until the wax melts. The wax flows out, leaving a cavity for metal casting. This step prepares the mold for demolding.